Configure your array
After installing your registration key, the next step is configuring your storage by assigning devices to the array and pool devices. This setup determines how Unraid OS manages your data, protects it with parity, and optimizes performance with cache pools.
If you're struggling with any part of the Unraid installation, be sure to check out our Installation FAQ!
Assign Parity and Data disks
You’ll use the Main tab in the Unraid WebGUI to assign and review devices, including array and pool assignments along with any unassigned devices and your boot device (the USB flash device).
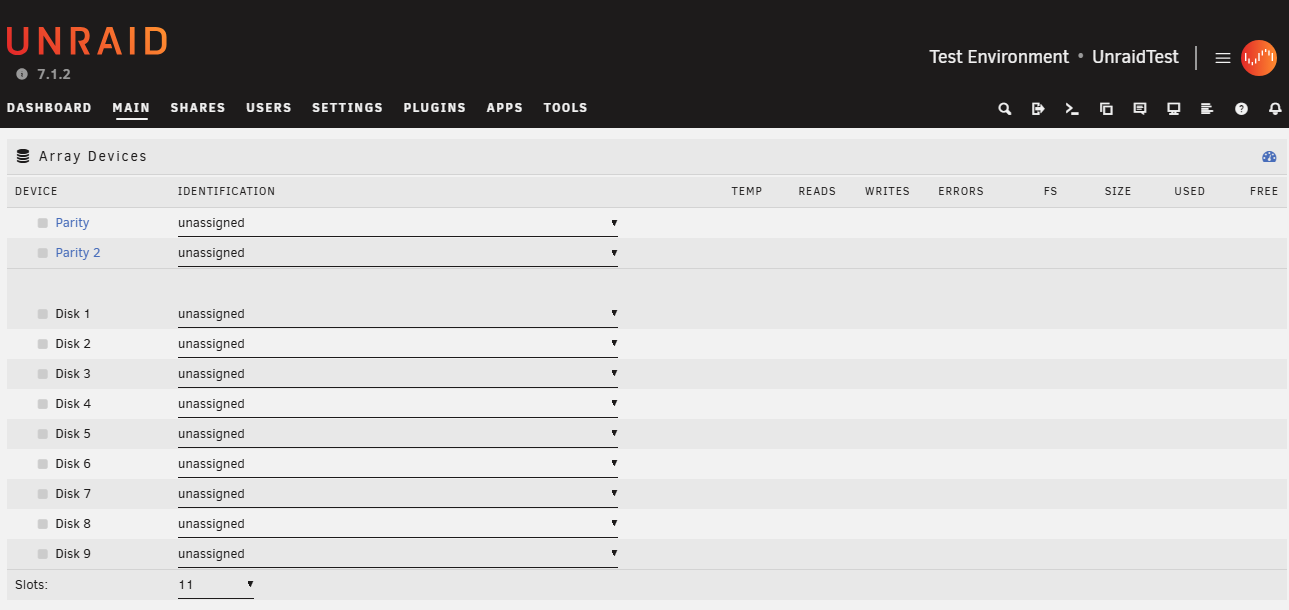
Device Roles
Unraid OS uses drives for various purposes:
-
Array Devices, which fall into two categories:
- Parity Devices: Provide fault tolerance, allowing recovery of data if a data drive fails. You can assign up to two parity drives.
- Data Devices: Store your custom shares and folders, as well as any files you add to them, i.e., media files.
-
Pool Devices: High-performance drives used primarily as a cache, storing files temporarily to enhance performance before transferring them to the array.
-
Boot Device: The USB flash device containing Unraid OS, which starts your server.
Disk assignment recommendations
These disk assignment recommendations are crafted to optimize your Unraid array, enhancing performance, data protection, and future expandability. By following these, you can effectively maximize your storage devices and avoid common setup issues.
-
Select the largest parity device:
Always choose the largest available storage device as your parity device(s). When expanding your array, data disks cannot exceed the size of your parity device(s). You should purchase the largest HDD for your initial parity device to avoid future limitations. For dual parity disks, all data disks must be smaller than the smallest parity disk. -
Utilize HDDs for the array and SSD/NVMe drives for pools:
For optimal performance, use HDDs as the primary storage devices in the array for general storage and parity protection. Assign SSD or NVMe drives to a cache pool or dedicated pool to enhance high-speed read and write operations. This setup improves overall performance by taking advantage of the strengths of each type of drive. -
Protect cached data with a multi-device pool:
To safeguard cached data, assign more than one device to the cache pool. A single device does not offer protection from data loss. Cache pools can be expanded on demand.
SSD support is experimental in the array. Some SSDs may not perform well due to variations in TRIM/Discard implementation, which could lead to undesirable results. This does not apply to cache pools.
SSD-based pools are optimal for applications and virtual machines, leveraging SSD performance for faster interactions.
Your array will not start if you exceed the number of storage devices permitted by your license key.
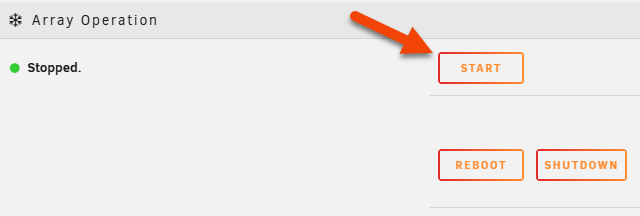
Start and format the array
After assigning all your devices, click the Start button under Array Operation to mount them and start the array.
New devices will appear as Unformatted and cannot be used until formatted. Unraid defaults to the XFS filesystem, but BTRFS will be used for devices in a cache pool. You can change the default filesystem in Settings > System Settings > Disk Settings.
To format your devices, check the Format box under Array Operation, read the prompt carefully, and click the Format button.
A parity sync will run in the background to protect the array even before formatting is complete. The array will function in an unprotected state until the sync finishes, so it's best to wait before adding data.
Changing filesystems on existing drives
To change the filesystem of an existing drive:
- Back up your data: Reformatting will erase all data on the drive.
- Stop the array and unassign the drive.
- Reassign the drive to the same slot and select the desired filesystem type (e.g., XFS, BTRFS).
- Start the array and format the drive.
Reformatting a drive will erase all its data. For RAID setups, check the parity to avoid data loss during rebuilds. Use the Unassigned Devices plugin to back up your files before reformatting.
You may stop the array, shut down, or reboot using the respective buttons in the same Array Operation section in the Main tab.